Happy Friday everyone!
Quite often you'll hear me talking about how I stayed up super late making a video. It probably leaves you wondering: "Does he just have extremely poor time management skills?" First off, ouch. Honestly, I really don't blame you for thinking this. Without an inside look at how the process works, what you're left with just me complaining about my life all the time. Every week, as long as there's a youtube upload, you get an answer to that hidden question in your head "Did Drew fail?"
me

I pride myself on hitting every single deadline, whether they be client based or self imposed. To do so compromises have to be made. The truth of the matter is that sometimes my line of work just necessitates that last minute crunch. So today I'm going to give you an inside look at the work that goes into video editing, my creation philosophy, and how staying up late is less of a defect and more of a strong suit.
Youtube is a strange beast. To gain an audience the key is establish a feel and then create regularized content. This rule is applicable in most video mediums as well. It's why Jeopardy doesn't suddenly produce a cooking segment.

But I'd watch anything as long as it meant we could have this man back
This formula is extremely contradictory to my creation philosophy. To me, the most important ingredient to success is passion. When my videos are devoid of passion on any level I feel as though the resulting product is sub-par. I watch a TON of youtube and I noticed something familiar in all of the content creators I really admire. There's a heavy reliance on graphics and transitions. That's not to say talking head doesn't work, but it works best when used sparingly. Using this new insight, I innovated on my graphics and transitions. It seemed like my videos were missing a certain flair.
It's the difference between this simple cut:

And these slides:

To the average observer it appears to be a relatively simple change, but in reality there's a lot of work that goes into this. What's important is that there is a sense of consistency between the content. Both examples include blurred video b-roll behind a smaller version of the same video b-roll with a drop shadow. I'm not reinventing the wheel - the audience should look at this and get that sense of familiarity with a little something extra to hold their attention. I think we'd all agree that the second example adds something dynamic that first example is missing.
In premiere this simple change looks like this

V1 - V11 correspond to the video files being shown on screen over the course of the timeline. Right now we're looking at "I'm trapped" the blue file on lines V5 and V6. The files are the same! V5 "I'm trapped" is the blurred behind video that slides in from the top. V6 "I'm trapped" is the in front video that slides in from the right.
Now let's take a look into the effects panel to see just how the f*ck I built these transitions from scratch.

This is the blurred behind video. The base scale for any imported video is 100. Trouble is sometimes the videos the clips I use for b-roll have smaller resolutions than project size (1080p). The scale value "219" just makes the video fill the screen.
Next we add the gaussian blur which is as simple as it sounds.
Then we Horizontal flip to get passed the youtube copyright algorithm
Everything we just did needs to be done with both examples.
"Transform" is where the transition comes in. You see those dots on the right? Those are called keyframes. Keyframes are used to make a video change over time. The first dot corresponds with the video's first state and the second dot with the video's second state. In state one we position the video off screen, and in state two we position the video center frame.
Ordinarily, you wouldn't need to add a "transform" effect tab to the video file because you can add keyframes to the "motion" tab. But here at Macular Media we strive for perfection. There's a very subtle difference between using the motion tab and the transform tab.
The difference can be seen more clearly with the second video slide in from the right. See if you can tell the very subtle difference.
Motion:
Transform:
Catch it? TBH the gif file format doesn't help, but you can still see it! In the first example the video is visible the whole time because there is no MOTION BLUR. By now you're thinking: "Are you kidding? You added a whole different effect just for a motion blur?" Oh, God, yes! Your subconscious can smell the extra effort.
To finish off I'll show you the effects panel of the upper video as well.

There's not a lot to draw your attention to here
Scale is 75 because I think it looked better scaled down
Radial shadow to separate the above video from the blurred background
Horizontal flip for the same reason as above.
Transform slide in directly after the below video finishes it's transition. You're probably now noticing that the first and second keyframes look different. The second keyframe has what we call an "ease in". With an ease in the video slows to a stop, but without it flies at full speed until it stops. Our brains have a pretty good understanding of the laws of physics and without the ease in something feels off.
Bam done! So now just copy and paste these effects over every time we break away for b-roll and we've established a feel. It's important to keep in mind how necessary a strong computer is to perform these actions. I am fortunate enough to have 64GB of dedicated RAM and a RTX2070 GFX Card. To simply put it, any computer under 1400$ would have trouble with these kinds of maneuvers.
If you think that effect was work intensive just imagine the work that went into this:

These text maneuvers are the bane of my existence. It would take me an hour to go into everything I did here. If you're interested in this let me know, and I'll make a separate blog post. All you need to know is that doing this takes anywhere from 5-20 minutes. What happens when you do it 6 times in one video?
The good news is, after a couple of weeks you start to get a hang of things! It's mindlessly easy to copy and paste transition effects from project to project. The process becomes streamlined, which makes life easier for me but also more mundane. Assembly lines are great for efficiency, but horrible for creativity.
2 weeks ago I made a video dissecting the pixar film Coco. As I was making it I found myself disappointed. The route of the issue was that the transitions felt uninspired. If you don't know what I mean by that, don't worry, I also have trouble pin pointing it. While the slides were a welcomed change of pace from a simple cut, the transitions themselves had no meaning to them. Sure they looked cool but, but why make them look cool if there wasn't a reason?
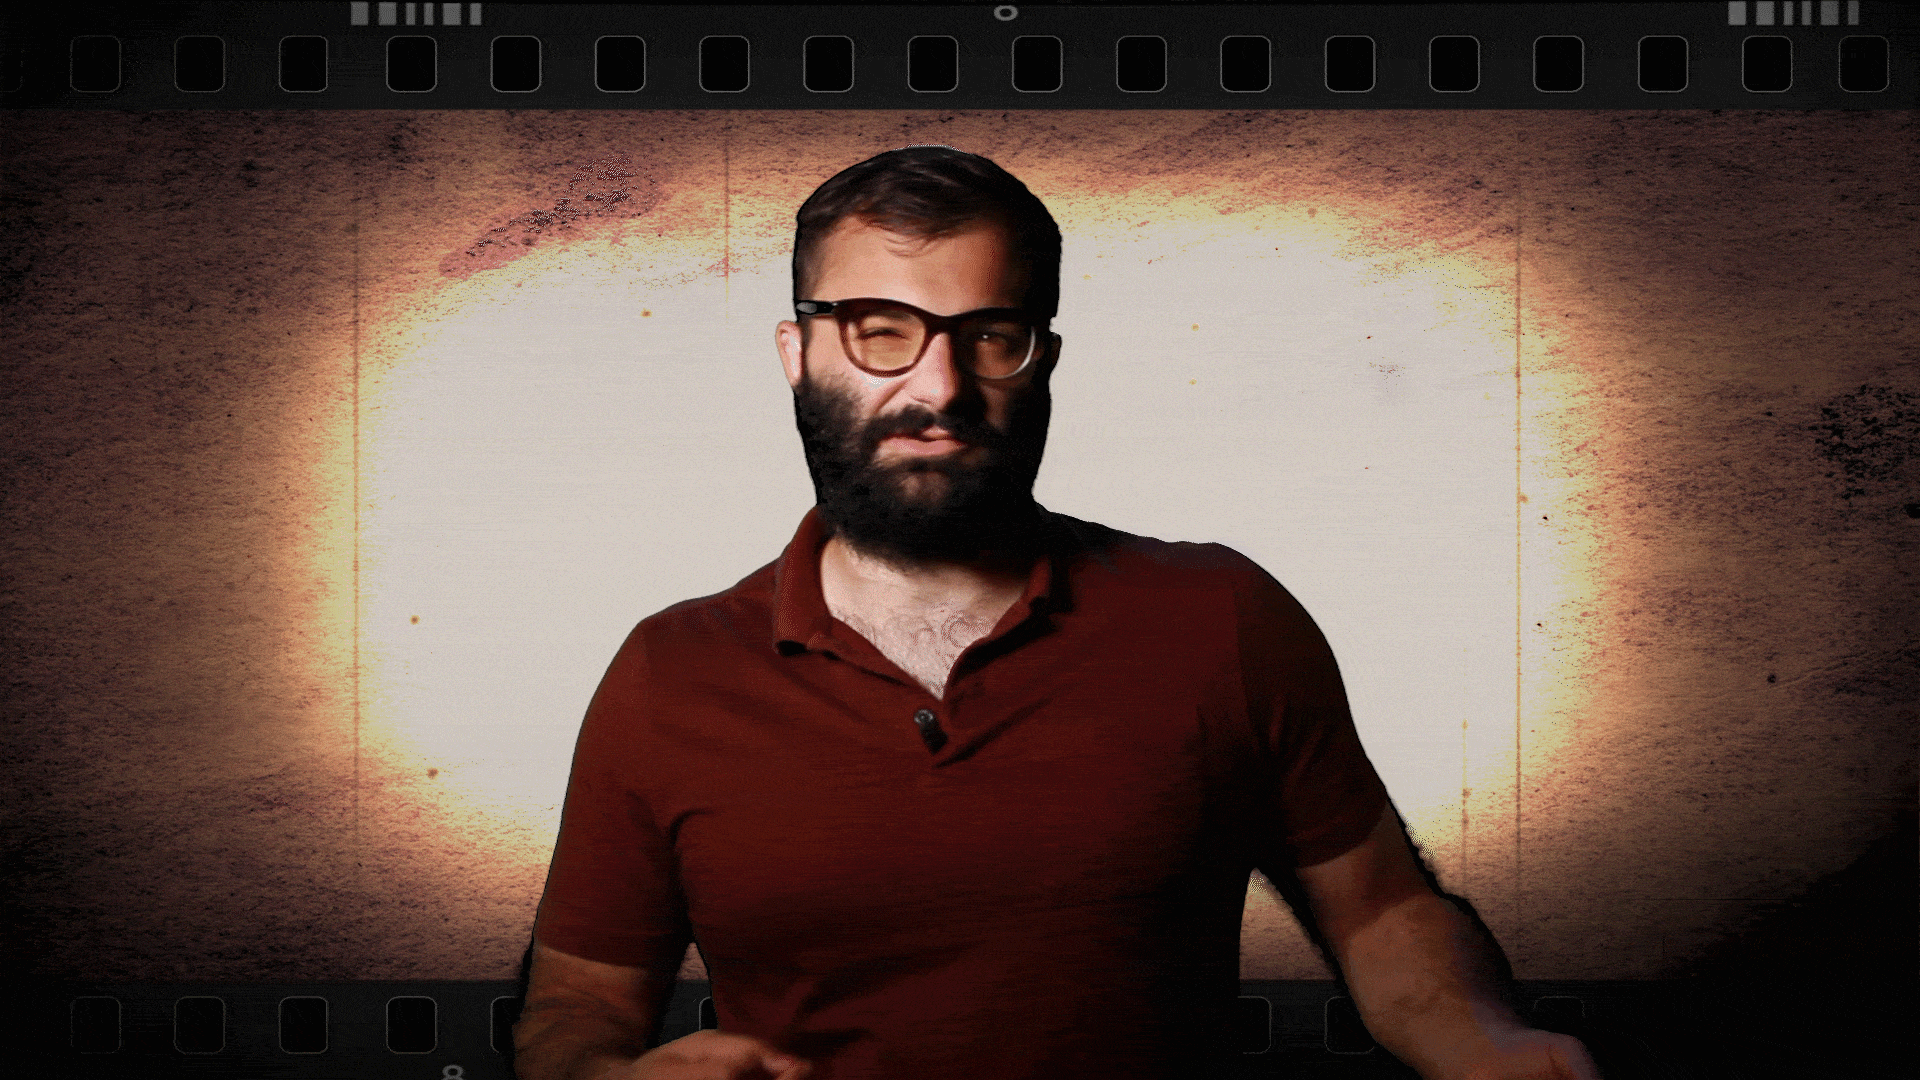
A week later for the 'Comet' video I decided on a whim to change them in the post production process. My goal was to make the transitions feel thematically inspired by the video series. It needed to be a recurring motif. The one through line that has been around for most of my videos has been the opening graphic.
Looking at this is making me realize that it might be time for a new opening graphic, heh. Not to tweet my own horn, but I will say that it's pretty inspired! It's an inside look at a reel of film, which works because we're film analysts. It's quick, easily understandable, and relatively simple.
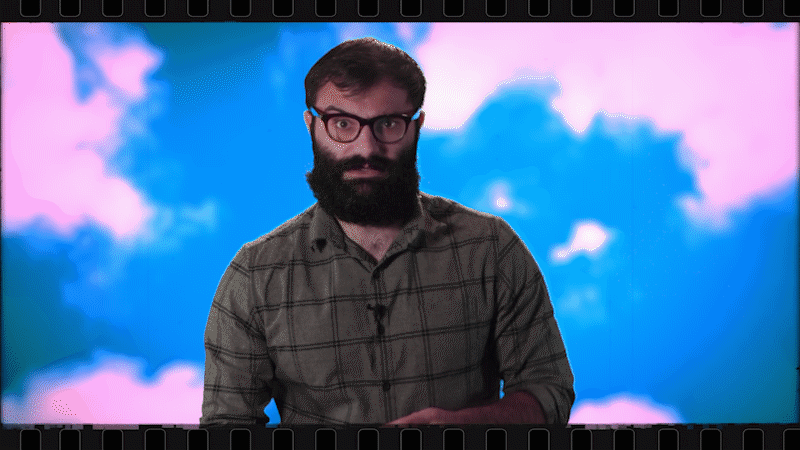
I started thinking - what if all of the videos took place on a reel of film. This solves a lot of the problems I have with my own videos. The transitions become thematically motivated. One film exposure has me talking about the film, the next has b-roll of the film, and the transition back and forth occurs because the film strip is moving along.
How hard could that be?

Turns out very!
Here's a screenshot of the timeline for that video. This mother effer has 14 video layers compared to the previous videos 10. Now to be clear, there are definitely easier ways to make effects like this. After effects is great at creating transition and graphic templates. In spite of this I try to avoid using it because it disrupts my workflow, especially when I have a deadline the next day.
Each layer here is vitally important to the project, and every single piece of footage has it's own plethora of effects attached to it. I could get into it but frankly I'm already amazed you've read this far. No need to waste more time. Why don't we just take a quick look at the most complicated move in the video and describe all of the elements? One last time. I promise.
We're referencing this part of the timeline

V14: The film overlay that frames me
Effect: Transform: slide out right. All the keyframes and motion blurs
V13: The film overlay that frames the b-roll
Effect: Slide in right. All the key frames and motion blurs.
V12: A Film grain overlay for the b-roll. This gives the b-roll an old school feel. (hardly noticeable here)
Effect: Color dodge
V11: Text "Lovebombing"
Effect: Fade in, Scale, Position
V10: Upper red rectangle for text BG
Effect: Transform slide in from right, all keyframes and motion blurs, scale, position change
V9: Lower red rectangle for text BG
Effect: Transform Slide in from left, all keyframes and motion blurs, scale, position change
V8: Gray BG for text BG
Effect: Fade in, scale, position change
V7: Free Space!
V6: Kind of a free space (Left open for me to slide in from bottom and talk over b-roll)
Effect: Transform Slide in, Chroma Key, Scale, ETC
V5: Top B-roll
Effect: Scale, Radial Shadow, Horizontal Flip, Transform slide in from top, all keyframes and motion
blurs.
V4: Bottom B-roll
Effect: Scale, Gaussian Blur, Horizontal Flip, Transform slide in from left at EXACT SPEED OF FILM OVERLAY IN V13, all keyframes and motion blurs
V3: Me talking!
Effects: Scale, Position, Transform slide out right at EXACT SPEED AS FILM OVERLAY IN V14, Chroma key out green screen, color correction
V2: Film grain overlay for the sky bg behind me. Gives the Sky a old school film feel
Effect: Color dodge
V1: Sky BG behind me
Effect: Scale, color correction
Do you understand what I'm getting at here? The final product shows me moving with a film reel out, b-roll moving in, and a simple line of text. I summed up in one sentence what it took upwards of 45 minutes to make.
Earlier in the video when I first made this transition I noticed it took me 20 or so minutes. After looking at the timeline now it appears I utilized this transitional motif 35+ times. At 2:30am on Monday (when I finally pledged my loyalty to Satan) I was gifted with the knowledge that, in my arrogance I had dug my own grave.
The transitions are built now, so I can easily throw them in next week's video. Although they still need some tweaking for the most part they are finished. That is, until 3 weeks from now when I make a video that I deem to be satisfactory. Until then, Satan help us all.
See you next week, Chaps
- Drew